
ENGINEERING GUIDE / REAL PROJECT DOCUMENTS
Display Integration Project Brief Checklist
What should you send before requesting a quote? Build a display integration project brief using lessons from a real customer data package and vanesen inspection records.
For OEM procurement and engineering teams. No email required.
START WITH THE RIGHT SCOPE
Start your display integration project brief
Send the application and selected variant, current mechanical files, touch and display references, artwork, electrical interfaces, quantities and acceptance requirements.
The useful step is connecting these files. A housing can be clearly dimensioned while the selected touch variant, cable route or delivery documentation remains unresolved. A complete brief gives both teams a shared basis for review.
AN ANONYMIZED PROJECT EXAMPLE
Three kinds of evidence.
Three different jobs.
A display integration project brief separates what the customer requests, how the assembly is described and what inspection actually records. The anonymized example below illustrates these three types of evidence.
Define the requirement
- Procurement specification and variants
- Front-panel housing and assembly drawings
- Schematic and PCB layer files
- Test, identification and delivery requirements
Use the specification to align the selected variant, required tests and delivery documents before quotation.
Connect the interfaces
- Housing, window and complete layer stack
- Touch-only versus physical-key variants
- Artwork, circuit and connector references
- Part changes and revision ownership
Record proposed changes against the agreed baseline and confirm responsibilities before sample manufacture.
Document the decision
- Nominal dimensions and tolerances
- Sample measurements and judgments
- Applicable outgoing inspection checks
- Supplier acceptance disposition
Read each result with the sampling scope, checks performed and release decision recorded on the sheet.
Source note: this anonymized example combines customer requirements and supplier inspection documents from different revisions. Customer identifiers and proprietary technical values are withheld.
THE PROJECT BRIEF
Six inputs for your display integration project brief
Open each section to see what to provide and why it matters in this project example.
Define the front panel before selecting its parts.
State the equipment, installation environment and operating conditions. Specify whether the order includes a front-panel assembly, a display module or a complete HMI. Separate a touch-only configuration from a variant with physical keys or lighting.
In the supplied procurement package, different front-panel variants have distinct mechanical and input requirements. Combining them into one unspecified build would leave the scope ambiguous.
Include in your brief: Application, variant, supplied parts, operating and storage conditions.
A front view does not define assembly fit.
Include the housing drawing, mounting datums, openings, rear clearance and an assembly section. Identify the viewing window, overlay position and complete stack. Mark fixed dimensions separately from features open to review.
The drawing set links housing geometry to overlay, spacer, optical adhesive, touch and circuit layers. Their relationship is the useful information; a nominal screen size alone is not enough.
Include in your brief: Current 2D/CAD files, critical tolerances and an assembly section.
Identify both the required parts and the visible finish.
Name the display and touch models, orientation, viewing area and input method. Provide artwork and any key or lighting requirements. State which components are customer-supplied and whether alternatives can be considered.
The customer package specifies resistive-touch configurations and an optional key arrangement. Artwork and component references need to match the selected variant.
Include in your brief: Exact component references, artwork and substitution rules.
Send the circuit reference and the applicable layout together.
Include the schematic, approved PCB layout files, connector and pinout information, cable exit and installation space. Identify unpopulated parts and layout notes that must carry through to manufacture.
The supplied schematic includes explicit placement and routing notes for protection components. A schematic reference alone would not communicate all manufacturing constraints.
Include in your brief: Schematic, layout package, interfaces and any keep-out or placement notes.
Agree the review points as well as the quantity.
Separate evaluation samples, pilot builds and anticipated production quantities. Define who approves a change, how revisions are recorded and what happens if a component becomes unavailable.
The procurement specification distinguishes compatible component changes from functional changes that require customer confirmation. It also asks for notification of component obsolescence.
Include in your brief: Sample plan, quantities, target dates, approval owner and revision list.
Specify what must be checked and what must be supplied.
Agree functional, optical and electrical checks, their acceptance criteria and the records to retain. List documents supplied once per configuration separately from those needed with every shipment.
The procurement package requests retained test results, identification and delivery documents. The earlier sample inspection pack contains measured dimensions, outgoing checks and an acceptance disposition.
Include in your brief: Test scope, inspection records, labeling, packaging and document list.
FROM THE INSPECTION PACK
Results you can trace.
Claims you can check.
The supplied report includes measured dimensions, methods and judgments, followed by outgoing inspection and a supplier acceptance decision.
Read the result together with the sampling scope. An OK entry for the recorded sample is not a guarantee about every future unit.
Some rows are marked not applicable. Customer sign-off, environmental certification and delivery of every requested compliance document are not established by these sheets.
TAKE THE NEXT STEP
Build your own
project brief.
Use the checklist on this page to prepare your display integration project brief. Record what you know and mark uncertain items for discussion. You can start with a preliminary drawing package.
Use the checklist as a guide for your own project notes.
- Application and selected variant
- Current mechanical and assembly drawings
- Display / touch references and artwork
- Circuit, layout and interface details
- Sample quantities and change owner
- Acceptance criteria and delivery records
This checklist stays on this page. No files or answers are sent to vanesen.
BEFORE YOU SEND YOUR FILES
Questions from
the buying process.
Start with the application, delivery scope, mechanical drawings, component references, artwork, interfaces, quantities and acceptance requirements. Include the applicable schematic and layout if the assembly includes a circuit. Mark missing items so that they can be discussed before a firm scope is agreed.
Use a sample to explain the installation and intended result, then list the dimensions, component details and inspection criteria that are still unknown. A sample is useful context; it does not replace an agreed drawing and test scope.
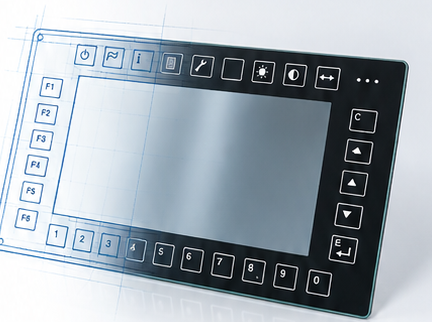
The agreed bill of materials defines the supply. The example concerns a touch/front-panel assembly; its reference photograph does not establish that an LCD module or a complete computer is included. Define display, controller and software responsibilities explicitly.
No. A procurement specification states what is required. An inspection record states what was checked and the recorded result. Link both to the correct configuration and revision before accepting a delivery.
The reviewed inspection sheets support the recorded dimensional and outgoing checks. They do not establish an environmental certification or a quantified before/after design improvement. Additional evidence would be needed for those claims.
HAVE A FRONT-PANEL PROJECT?
Send what you have.
Make the open questions clear.
Tell vanesen your application, selected configuration, available drawings and target quantities. Include the tests and documents your team expects with delivery.